


This Hedonites of Slaanesh Tactica is part of a multipart series you can find the other posts here – it probably makes sense to read Part One about the Battle Traits as a starting point and then return here afterwards. Although, since the Balance Update there have been some changes that might not be reflected until Part 4!
A note on List Archetypes – probably important to make this clear: I’m not saying this list is going to win tournaments. It’s more about exploring a play-theme or style that can be built from the Index and seeing what are the combinations that work within that style. Equally these are not meant to be meme-lists. Hopefully, they will serve to get you thinking – the main reason I write these is they really help to get me thinking about the synergies available to the armies that I play. A great list will probably draw on some elements from a couple of the List Archetypes looked at here (or more besides). Hopefully, by the end of this piece you’ll have some ideas of other synergies or even better approaches – please share them in the comments section if you do, as always keen to see how people build their army lists! Anyway, back to this post proper.
This time we’re going to look at another list archetype Daemonic Recursion so we’re going Daemon heavy in this list and going to try and take maximum advantage of a few things:
- The cheapness to deadliness ratio of Daemonettes
- That there are some ways to offset the massive downside of Daemonettes – namely that they die in droves if you look at them slightly wrong!
Daemonic Recursion (2000 points)

ARMY

Grand Alliance Chaos
Hedonites of Slaanesh
Epicurean Revellers
2000 Points Limit
Drops: 2


Regiments
General's Regiment
Keeper of Secrets (440)
 • General
 • Strongest Alone
 • Pendant of Slaanesh
Blissbarb Archers (280)
 • Reinforced
Daemonettes (220)
 • Reinforced
Daemonettes (220)
 • Reinforced
Daemonettes (110)

Regiment 1
The Masque (150)
Fiends (150)
Fiends (150)
Seekers (280)
 • Reinforced

Created with Warhammer Age of Sigmar: The App
Exported with App Version: 1.0.1
Data Version: v128
The main premise of this list is that you’ve got a couple of scary blocks of Daemonettes and between the Battle Formation rule and the Keeper of Secrets nothing needs to stay dead for very long.
So starting with the Battle Formation, we’ve gone for Epicurean Revellers

This means that without any other bonuses, all Non-Hero Daemon units are rolling 9 Dice when they use the Rally Command.

This means that even the Fiends have a decent chance of rolling enough 4+s to bring back a slain model. For your Daemonettes and Seekers units you’ll also get the Musician bonus (+1 Dice when you Rally) so you’ll be rolling 10 dice meaning on average 5 Daemonettes returned to a unit or 2 Seekers (plus healing a damage point). This is still a dice game so you can’t fully account for rolls outside of the average but outside of Epicurean Revellers it’d be a hard sell for me to throw the Rally command at a unit of Fiends unless they had a couple of damage allocated and so would benefit from a lower roll as the chances of resurrecting a model would be too slim on just 6 dice to justify the Command Point.
This means that as long as your units don’t get completely wiped out or locked in drawn out combats you have a decent chance to keep them around. However, as mentioned before, Daemonettes aren’t particularly durable and if you get hit by something decent there’s a chance you’ll be picking them up with a dust-pan and brush. The Keeper gives us a little further security with the Locus of Slaanesh ability.
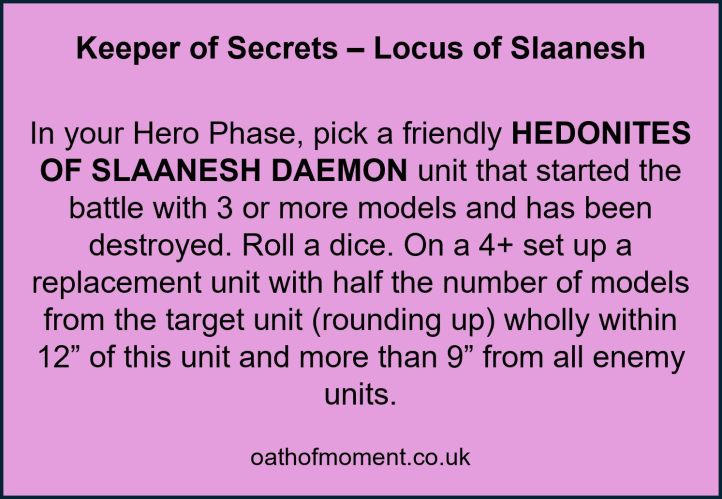
It’s never good to lose a unit but it is sadly inevitable, even with so much Rally potential! A 4+ is by no means a sure thing but whilst the Keeper of Secrets survives it’s an option in each of your Hero Phases. Bringing back any of 10 Daemonettes, 5 Seekers or 2 Fiends ( or 5 Daemonettes if you bring back the smaller unit) can be massive, particularly if you can bring them back somewhere where they can steal an objective or secure a Battle Tactic for you. My view with this ability is that it’s a bonus if you get it but not something to bank on. Especially as the Keeper of Secrets is here to do so much more than just bring back dead Daemons.
This particular load-out on the Keeper of Secrets already looks like a favourite looking at other lists online so far, but if you’re not familiar with it, we’ve got the Artefact of Power and the Heroic Trait doing some work to turn the Keeper of Secrets into an all round threat. First up we have The Pendant or Slaanesh.

Guaranteed Heal (3) is great. The caveat being that you have to have taken some damage to gain access to the Heal. This is fine in turns you’re in combat, but in all honesty you’ll likely choose to take damage in most of your Hero Phases also through the Fane of Slaanesh’s Damned Conduit rule.

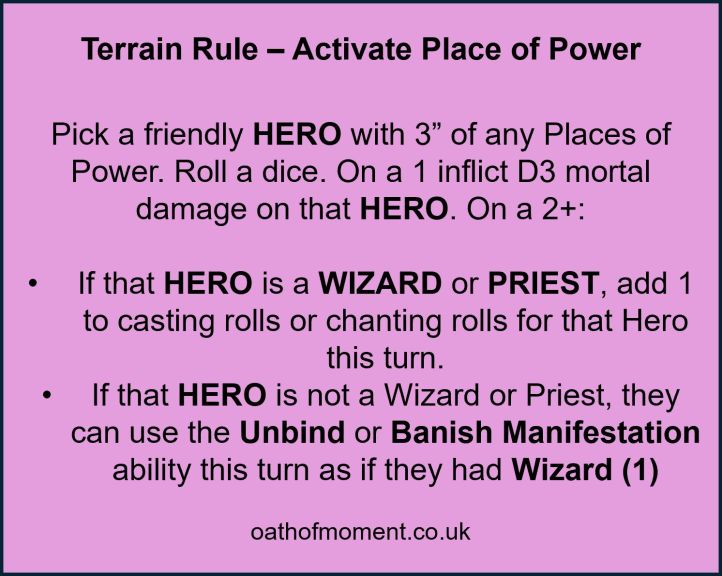
This means whatever the damage caused by the Fane, you’ll heal it back. Whilst you can use the Fane to increase the speed or combat potential for the Keeper of Secrets. Mostly you’ll be using this to turn your Keeper of Secrets into a good caster, especially if you set up your Fane of Slaanesh near a Place of Power to double-up on casting buffs.
One of the reasons we’re less likely to boost the combat potential of the Keeper of Secrets through the Fane is because its Heroic Trait Strongest Alone does some of that for us.
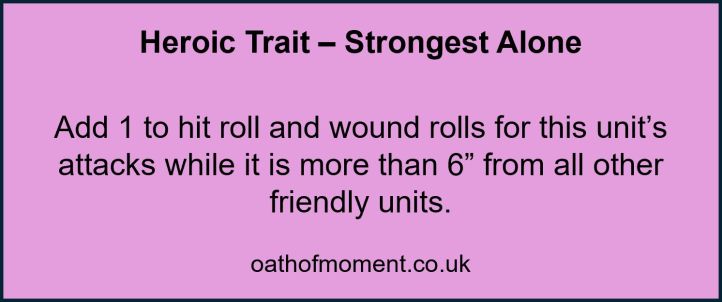
Personally, I wouldn’t play particularly hard towards guaranteeing this bonus and isolating your Keeper of Secrets just to get the benefits of the rule, often, if you’re needing the boost of Strongest Alone, you can be clever with your Charge move and Pile-In move to ensure you have moved yourself away from friendly troops to get it. However, your Keeper of Secrets can be a bit of a support and reserve rolls as there are two spells you’ll often want your Keeper of Secrets to cast – Sadistic Spite and Overwhelming Acquiescence.

Always worth calling out that not only does this spell have the UNLIMITED keyword, so can be cast multiple times in the magic phase if you have other Wizards, it also has unlimited Range – the target just has to be visible. The lovely tall slender physique of the Keeper of Secrets can definitely do some work for you here!
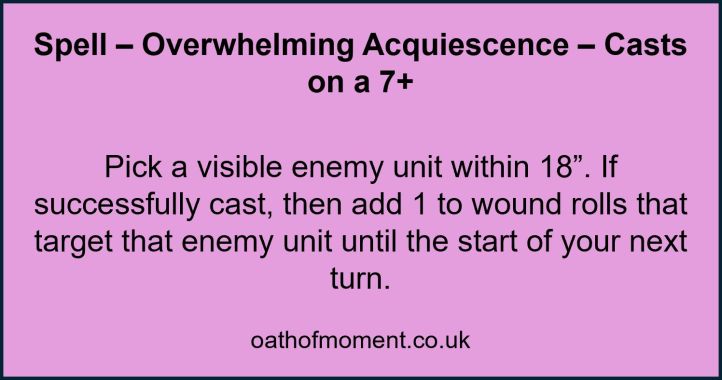
Overwhelming Acquiescence is great for boosting the wound rolls of Hedonites units. There’s a lot of 4+ to wound in the Hedonites Index and this helps to make the dice a little kinder for you. It’s especially important on profiles like the Daemonettes’ claws where it can take the quantity of attacks to a place of pretty decent quality also!
Overwhelming Acquiescence has a fairly generous 18″ range, so your Keeper of Secrets can afford to hang back a little and be a backfield hunter and mobile reserve piece plugging gaps where required, but otherwise orchestrating the carnage your Daemonettes are going to dish out.
The Keeper of Secrets has a pretty respectable combat profile and it can potentially boost this further with Dark Temptations.

This allows the Keeper of Secrets to increase the damage on its Elegant Greatblade attacks at the cost of a small buff to your opponent’s unit. It’s quite important to weigh up whether this is worthwhile though as any of these buffs could be catastrophic if played at the wrong time. If you’ve caused a little bit of chip damage, then letting them Heal (D3) before causing a great deal more damage on top can be the best pick. Always feels good if you’ve caused just 1 incidental damage on the unit so they don’t even get to enjoy a higher roll on the D3. If you’ll cut through their armour save anyway with your Rend 2 then that might be the best choice. If you’re confident you’ll remove the unit before they can strike or that they’ll only cause minimal damage then +1 to hit can be a good choice. It’s worth mentioning here the Keeper of Secrets Supernatural Grace here:
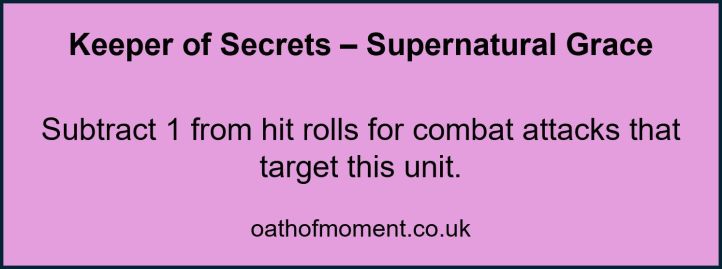
Giving your opponent +1 to hit against the Keeper of Secrets will just put them back to hitting on their base roll. Which if they’re lower output units might not be too risky – although if your opponent has a Command Point left then All-Out-Attack suddenly puts them back to +1 to hit total.
On average, if a Keeper of Secrets is in a position to benefit from Strongest Alone and offers a Dark Temptation, it should do about 15 damage to a unit with a 4+ save (no ward). This gives you an idea of when it’s maybe safest to use Dark Temptation.
So, the Keeper of Secrets is an amazing all-rounder, as long as you’re sensible and pick your fights. What about the rest of the list..
There’s a LOT of Daemonettes in this list so probably makes sense to look at them next. There’s not a great deal of subtlety to them really. With two attacks hitting on 3s and wounding on 4s with Rend 1 for 1 Damage it’s a fairly standard Slaanesh profile, however, the Lithe and Swift rule helps to make that feel slightly better than standard.
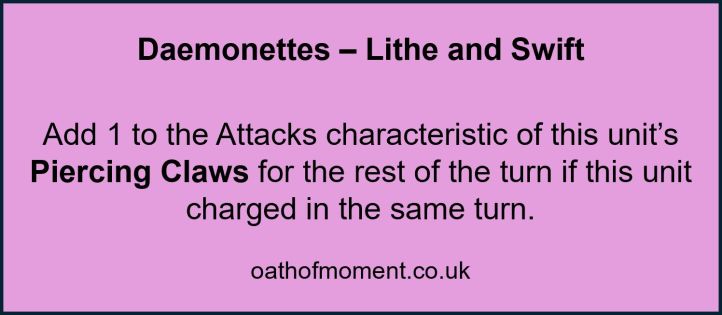
The 6″ movement that Daemonettes boast isn’t bad but to ensure they’re getting the charges you need will take some careful play and potentially clever use of the Battle Trait to give them Run and Charge on the key turn. Ultimately, the boost to their damage from being Euphoric is going to be worthwhile when they get into combat. You can ramp their combat output levels up further with Sadistic Spite.
Sadistic Spite is very good for Daemonettes. The only time you don’t benefit from upgrading Crit (2 Hits) to Crit (Mortals) on them is if they’re going into something with a 6+ save (assuming they don’t use All-Out Defence) – so if they’re Euphoric, you pretty much always want to further boost them with Sadistic Spite. On the charge, one of our reinforced units of Daemonettes will cause 20 damage (on average) into a target with a 4+ save if they have Sadistic Spite, 16 with just Euphoric in the same conditions or 13 with neither.
Remember, you can further boost that combat output with Overwhelming Acquiescence and anything else that might boost you hit and/or wound rolls – although the wound rolls are where they need the most help!
Now, this all sounds awesome, but there is a really obvious downside to having Daemonettes in the list though – they’re as sturdy as wet toilet paper! Thankfully, the Recursion built into the list can help offset some of that – as we’ve seen already you’ll be rolling 10 Dice for any Rally rolls for them – so on average you can bring 5 back each Hero Phase that they’re not in combat and then when the worst happens you can potentially bring them back at half-strength from the Keeper.
There is an odd upside to the fragility of Daemonettes. I assume due to their slender nature, they remain the only one of the battleline Daemon units not to have been re-based and they keep their 25mm bases, for now! This actually really helps their damage output, especially with the combat range in 4th Edition being a hefty 3″. Daemonette bases are just shy of an inch thick so even if you have to rank them up a few deep to get into combats, you should be able to make it so most if not all are able to fight every turn. This can be huge with horde sized units who sometimes suffer from being a tad unwieldy and should actually manage to make their numbers count in combat.
This list has two reinforced units and the one unit of 10. You’re probably going to want to screen with the smaller unit to help ensure your scarier units get their charges for the bonus attacks. In addition, the Daemonettes want to fight before your opponent’s units get a chance to thin their numbers and limit their damage. That’s where the next unit comes in…
Fiends of Slaanesh are a bit of an odd unit in 4th. It’s really easy to get caught up in what they can’t do:
- BEAST means they can only ever have a Control Score of 1 regardless of any buffs (also worth pointing out the lowest it can be is also 1 – so you always know what you’re going to get at least!)
- COMPANION means that their attacks aren’t affected by any abilities that affect weapon characteristics or the attack sequence – e.g. EUPHORIC
I know a lot of the online discourse for Fiends has been around those two facts. However, there’s still plenty that they can do. The main reason we’re taking them though is their Soporific Musk ability.

So whilst it’s a 50/50 chance, Strike-Last can be killer for lots of units, especially on the charge so your opponent is going to have to make some choices when they go in. The Fiends are going to help dissuade some opportunistic charges into your Daemonettes and even when your opponent does charge, there’s an equal chance they’ll only be fighting with what’s left after your Daemonettes and Fiends are finished with them.
The combat output of the Fiends isn’t awful (Anti-Monster (+1 Rend)) is good at least but in truth they’re here as a utility unit. Their 12 wounds aren’t exactly durable but they’re also not going to be lifted off the board in one go without a proper combat unit coming after them. As we’ve seen, when they die, your Keeper has a chance to bring back 8 of those wounds and whilst the Objective Control score of 1 might impact their ability to score points for you, 1 is still higher than 0 and they’re equally useful for running off and scoring Battle Tactics too – at Move 10″ they’re pretty quick!

As an added bonus (and not something I’d be looking to play for necessarily) if they’re near an enemy wizard they can mess with their casting and unbinding rolls thanks to Disruptive Song.

They’re not the heavy-hitting (but ever-so-swingy) monster killers they used to be in 3rd edition any more but I think there’s still a place for them.
Seekers are another Daemon unit, to help us maximise the potential on recursion. In smaller units they’re a great utility unit with an insane amount of speed for claiming points (and when destroyed, this reinforced unit could come back as a 5 to do exactly that) but in this list they’re there to add some further killing power for us and allow the army to reach out a little further to take units off the board.
Almost everything we liked about Daemonettes applies here. The Seekers don’t have Lithe and Swift but they have the extra attack baked into their profiles with some bonus attacks from their Steeds (COMPANION attacks so again, won’t benefit from Euphoric etc). The Seekers have a role defined for them, a little, with Anti-Cavalry (+1 Rend) boosting their claws to Rend 2 into the many various popular cavalry units at the moment. As an individual, a Seeker causes more damage than a Daemonette but compared to our reinforced Daemonette units, the Seekers aren’t as heavy hitting due to their lower numbers. What they do bring to the table though are a couple of key differences that I think make them worth considering in this size of unit. The first of those is Quicksilver Speed.
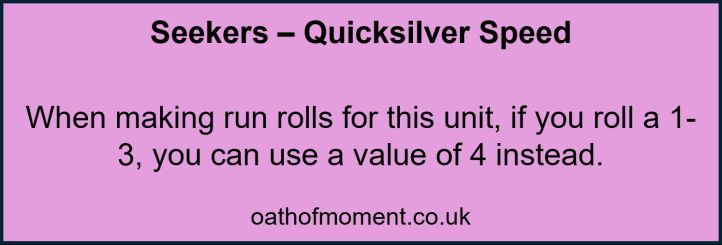
This is a rule that makes smaller units of Seekers incredibly useful for running and scoring objectives and Battle Tactics for you but also helps you add an extra layer of certainty to getting the charges that you need. If any other unit is Euphoric, there’s certainly an argument for using a Command Point for At the Double to make your charge as easy as possible.

But, if you can guarantee a minimum of an additional 4″ onto their movement, that’s a minimum of 16″ they’re going BEFORE they charge. There’s 18″ between armies on deployment. That means you can often save the Command Point for the charge, should you need a re-roll from Forward to Victory (should you roll the dreaded Double 1) or even better for All-Out-Attack to stack up the damage that the Seekers (and their steeds with All-Out-Attack affecting COMPANION weapons). Probably worth stating here – I don’t see the role for these being a Turn 1 Alpha Strike unit – that example is just to help illustrate the speed at which they can move.
The other massive advantage that Seekers have over their Infantry sisters is that they’re big, tough, cavalry… well by Slaaneshi standards at least! Other armies might laugh at Cavalry with a 5+/6++ but with 3 Health, they’re durable by the standards of many Slaanesh units. You’re not going to want them in protracted combats, they’re still fragile ultimately, but they give you something a little different and at 140pts for 5 they’re the cheapest of our cavalry options currently.
The Masque of Slaanesh rounds out the Daemons in this list. Firstly, we needed a cheap-ish Hero to lead the second regiment but The Endless Dance gives the Masque a lot of utility on the scoring front.

I tend to think, half of the game with abilities like this is around the psychological impact that they can have on your opponent. The Masque is an alright small hero but she’s nothing too scary, so that 3″ Redeploy sounds like it might be more of a worry than it really is. Mostly, this will be useful for allowing us to be on objectives we might not want to extend ourselves to reach early on and/or for scoring an early Battle Tactic. As it’s a Redeploy she plays a part in the wider deployment sub-game you can play with your opponent. She can be initially deployed to claim a flank by herself. If you’re not going to have control of Priority from your 2-drops (you probably ought to fairly often) then I would suggest not dropping regiments and deploying individual units, and she’s a great shout here as you don’t have to give anything away before your opponent does as she can be moved elsewhere before the battle starts. As her reposition happens in the Deployment phase she’s also not ruled out of scoring some Battle Tactics like ambushing units or other reserves who come on once the turn has started can be.
The Masque’s Staff of Masks does an interesting job of making the Masque a little trickier to deal with too.

An extra 3 attacks puts her to a pretty respectable (for a little Hero) 9 attacks. She’s not going to delete stuff, in fact, you’d probably need to pile-on the buffs to make her a proper threat but she can be a handy little assassin for similarly small Heroes or to tie up and work through shooting units that don’t have Shoot in Combat to help them out. Mostly she’ll be a nuisance or do some jobs for you. The other option for Heal (3) coupled with her 4+ Ward Save means that removing her might require your opponent to commit something proper to make sure, which, if she’s positioned to drag stuff out of the way, could cause your opponent real problems. Not bad for a Hero we’re including because we needed 3 spare regiment slots for units!
Finally, we have our Blissbarbs. They don’t fit the archetype in that they don’t benefit from the recursion built into the list but they’re what stops this just being a meme list. Blissbarbs are an incredibly good unit for Hedonites of Slaanesh and it’s hard to justify lists without them!
In this list, the Blissbarbs offer you some ranged damage, they allow your force to reach out a little further and they force your opponent to have to come and deal with you. They could choose to ignore your scary Daemonette horde, but that gets harder when you’ve got the Seekers to take the fight to them and the Blissbarbs to keep chipping away at them, forcing them to open up.
It’s going to be worth giving them Priority Target under the Honour Guard rules for this Season (2024-25)

Depending on how your opponent’s list is structured this may or may not give them lots of targets that they’re getting the bonus against, but you’re often going to want them to be Euphoric and you’re also going to want to save a Command Point for them to be able to use Covering Fire often too.
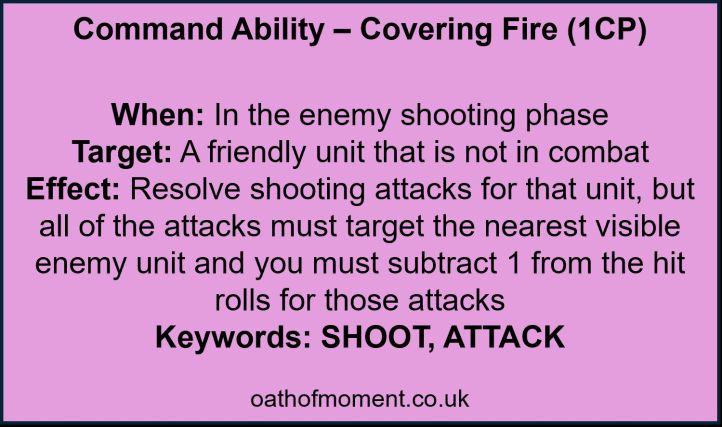
Even if your opponent’s General is the only unit in their regiment, the bonuses are likely worth it, but you have the flexibility of picking a different Honour Guard rule for the Daemonettes instead as an option.
Ultimately, this is about creating pressure on your opponent and forcing them to have to make some decisions as that’s where mistakes may happen. They’ll need to consider the threats from your Daemonettes, your Seekers and your Blissbarbs in how they approach your army and each of those units gives you slightly different ways of trying to open your opponent up. You then create additional pressure by having the Keeper of Secrets to help recycle units but also to be a big scary monster that’s quite mobile and happy to play a slightly reserved role at the beginning of the game, reacting to what your opponent does and where they go.
What about scoring with this army then? Looking at each of the Battle Tactics in turn there are a few things to consider and a few units that stand out as being likely candidates to help you complete these.

Take The Flanks is an interesting one with this list. It’s one of the easiest Battle Tactics to score, in theory, but there is a careful balance with not over-stretching your force to achieve it. I feel like this army isn’t going to want to spread out too much at the beginning, so, The Masque may be very useful in helping you score this early on thanks to her Endless Dance and then she can occupy something away from the main body of your force which you might want to keep focused more towards the opposite flank to her. Alternatively, you have the Fiends or the 10 Daemonettes who are the most expendable units, but the Daemonettes in particular could become isolated due to their speed but also might not draw as good of a unit out of the line as The Masque might. The Fiends probably have better use, certainly early-doors anyway, in being close to key units to provide the risk of that Strikes-Last ruining your opponent’s plans.

I’ve mentioned the risks of this Battle Tactic previously, but it can remain a good one if you’re going first as long as you don’t over commit in achieving this. Whilst The Masque could in theory be a good choice again for scoring this early, I do think she’s probably best suited for being a nuisance out on a flank to begin with so you’re possibly looking to your Fiends and maybe the small unit of Daemonettes to move up to score this. At least then your screens are pushing up. I think this really depends on what your opponent is playing and what they’re likely to be looking to do Turn 1. If, for example, you’re playing a battleplan with an objective on the centre point of the table, you’re potentially giving your opponent not just a target but a way to help move their forces up with charges etc and there’s a real risk you’re sacrificing two units just to score this at the beginning of the game – hence why I remain cautious about it! It may be easier to score later on when your units have removed the bulk of the opponent’s army.

The Masque says hello. You may be starting to see a theme here with her potential importance to some of the Battle Tactics. This might be a really good choice for Turn 1 or (probably more like) Turn 2 or instead saved until the late game when some of the others can become a bit less reliable to score. A lot will depend on the terrain layout you’re looking at. Worth considering this when you’re picking table edges etc. Whilst the terrain feature you pick has to be wholly outside of your territory, the model controlling it doesn’t have to be, is there something close to the line that you can snag without having to draw too near and risk a Redeploy or Counter-Charge from your opponent? Controlling terrain works similarly to objectives so just be mindful of this, the Fiends remain a great little unit to run off for these sorts of errands but BEASTS means they’re often not going to be able to exceed the Control Score of enemy units (a problem The Masque can have with this one too!) so it’ll need to be a terrain piece well away from the main lines of battle if you’re sending them.
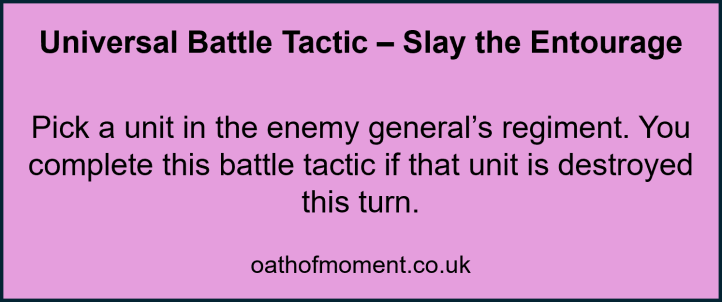
The Blissbarbs and them gaining Priority Target is probably crucial to scoring this one, not least as you don’t have to necessarily commit to destroying the enemy unit in combat. If your Blissbarbs can destroy either the General or a unit in their Regiment this turn then this becomes a good choice. Otherwise, it may take a little more work to set up. Most things in the list though are capable of taking down wounded prey, so definitely a Battle Tactic best saved for when there’s an easy target and as little risk of them surviving as possible.
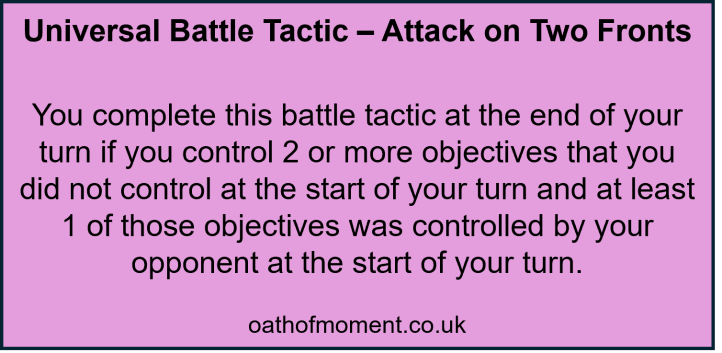
This one is especially battleplan dependent. Only one of the objectives has to have been controlled by your opponent so one can be unclaimed but that condition still means this is unlikely to be one you’re scoring early doors – unless The Masque or someone can creep onto an objective your opponent has abandoned early on. Thankfully, you don’t have to pick the objectives when you declare this one so you can play some of this close to your chest. The Seekers stand out as a potential source for helping score this due to the high movement and being able to potentially shift an enemy off of an objective at the same time and then one of your more expendable units can pick off an unclaimed or abandoned objective elsewhere perhaps.
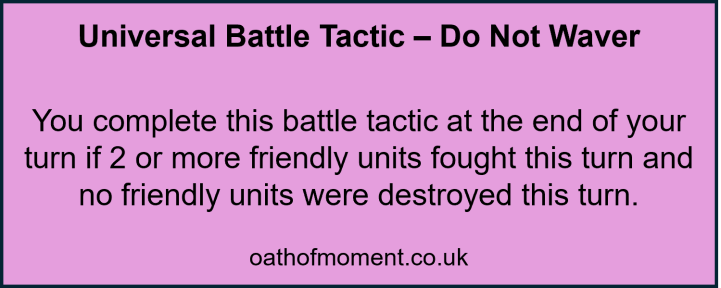
This one makes me twitchy with a list like this one. There’s often nothing especially tough in Hedonites lists at the best of times. Two units fighting means that one could be the Keeper, one of the more resilient things in this list, but the other… again, probably looking for opportunities to pick on wounded targets here to ensure that any attacks that come back at you are unlikely to be of sufficient quantity or quality to remove stuff. However, there is so much counter-play open to your opponent here by using the various commands to interrupt and suddenly make combats look less favourable with additional spells, shooting or charges out of turn-order. One to weigh up really carefully before choosing I think.
With the generic Battle Tactics out of the way, what do the Chaos Grand Alliance ones offer us by way of opportunity?

This one can work for us. The key things that stand out on this Battle Tactic, especially after looking at Do Not Waver is that we don’t have a Combat requirement and we also don’t have to rely on any sturdiness to go with the deadliness of our Hedonites units. Again, you’re ideally going to want to try to time this for a turn in which you have some weakened targets to pick on. Your Blissbarb Archers will likely play a key role in helping deliver this one, either by removing a unit (or two!) themselves or by softening targets up to ensure that you’ve got plenty enough damage potential in the combat phase to lock the points in. Again, looking for opportunities to maximise the benefit of Priority Target on them probably makes the most sense. If your opponent has a few screens or skirmishing units this can be a nice one for the earlier turns, otherwise it can be a nice one to fall back on towards the end of the battle when units are already depleted and at greatest risk of being removed (just beware that holding onto this one can mean your damage potential is also greatly depleted before you get to use it!) But Daemonettes, Seekers, and the Keeper can all put out significant damage in combats in the right circumstances. Again, being mindful of where your opponent has opportunities for counter-play, but as we don’t have to pick the targets and we can afford to lose a unit in completing it if necessary then this can be a slightly safer choice for us!

So, whilst picking the objective up front does open up some additional counter-play for your opponent, this can be quite a handy one to have access to. You’re going to want to charge and you’re going to want to take objectives so it’s just timing this for when you can set up a couple of near-guaranteed charges. However, there will always be an element of luck in this one as we don’t have anything in the list with innate Charge re-rolls, so, if the Dice Gods are especially cruel it could all be for nought – probably want to be making a few charged to help guarantee and any around the objective you picked are prime candidates for a re-roll. Remember though, the only requirement is that you control the objective with one of your two charging units – so one charge could be The Masque chasing down some chaff on the opposite side of the board. There’s no requirement for you to kill the targets, just to outscore them on the objective you picked. That means those Daemonette units or the Seekers are probably stand-out choices as you’ll want them in combat and they have the numbers to tip an objective too.
So that’s a bit of an exploration of the Deamonic Recursion list archetype and how you might be looking to score your Battle Tactics. The list could be tweaked and used differently, if you wanted to, for example, you could lean a little more into the characters and consider something like Dexcessa to further build on the charge threat for your units. Let me know your thoughts on it and any experiences you’ve had using this or something like this!
Discover more from Oath of Moment
Subscribe to get the latest posts sent to your email.

[…] Part 3: List Archetype – Daemonic Recursion […]
LikeLike
[…] Part 3: List Archetype – Daemonic Recursion […]
LikeLike
[…] Part 3: List Archetype – Daemonic Recursion […]
LikeLike